Quick tips
- Soak frozen rice cakes briefly in water before cooking.
- Let the sauce simmer over medium heat and stir regularly.
- For a milder version, use less gochugaru and balance the sauce with a little sugar.
Make sweet and spicy tteokbokki with chewy Korean rice cakes. Choose the right rice cakes, adjust the heat and simmer a glossy gochujang sauce.
Korean street food
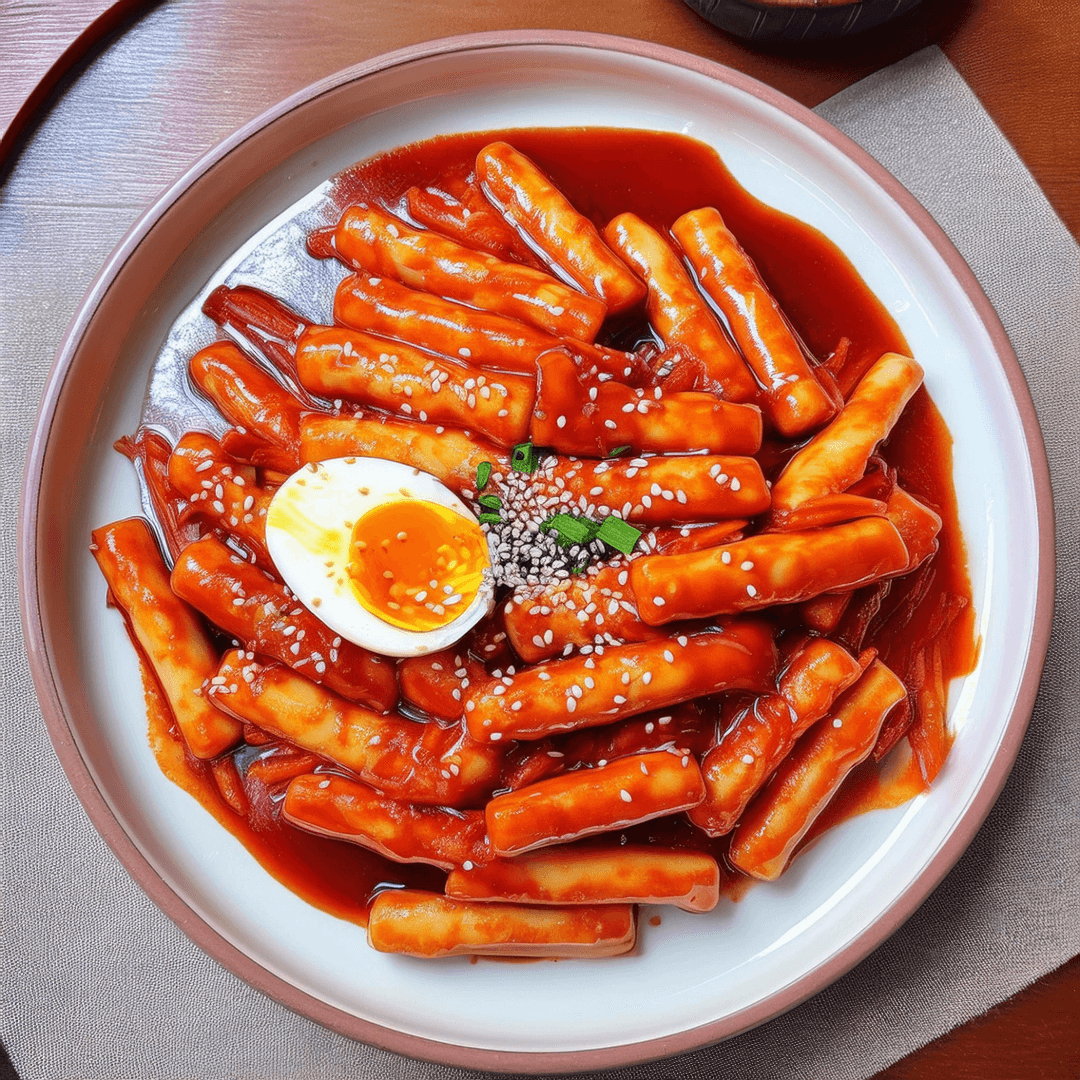
Tteokbokki is simple, but the sauce makes the dish. I like to let it simmer until it turns glossy and clings to the rice cakes instead of staying watery.
Tteokbokki (떡볶이) is a Korean street-food dish of chewy rice cakes in a sweet and spicy sauce. This simple everyday version uses water, gochujang, gochugaru and soy sauce, with green onion added at the end. The recipe makes 2 servings and has a listed total time of 30 minutes.
Choose 300 g of plain, cylinder-shaped tteokbokki rice cakes. Look for tteokbokki-tteok or topokki rice cakes at a Korean or other Asian grocery store, or an online retailer delivering to your country. A ready-made kit may include its own sauce; this recipe uses plain rice cakes with the sauce ingredients listed below. Crispy puffed rice snacks and sweet filled rice cakes are different products.
Follow the preparation instructions on your rice-cake packet. Frozen rice cakes may need thawing and a short soak before cooking; separate pieces that are stuck together. Fresh, refrigerated and frozen products do not all soften at the same speed. The rice cakes should become tender and chewy all the way through, rather than remaining hard in the center.
The sauce uses gochujang paste for its sweet, spicy and savory flavor. Choose the paste rather than a bottle of ready-made dipping sauce, which may already contain other seasonings.
It also uses gochugaru, Korean chili flakes or powder. These add chili flavor and heat but do not replace the paste spoon for spoon. Read the quantities in the ingredient checklist before adding either one.
Choose a milder gochujang and use less gochugaru if you prefer gentler heat. The result will differ from the listed recipe. Taste the sauce and adjust gradually: extra sugar makes it sweeter, but does not remove the chili already in the pan. Reducing gochujang also changes the sauce seasoning and body.
The recipe starts with 360 ml water. Stir regularly while the rice cakes cook so they do not stick. If the sauce is watery, let it simmer and reduce until it lightly coats the rice cakes and looks glossy. If it becomes too thick while the centers are still hard, add a small splash of water and keep cooking gently. Judge both the sauce and the rice cakes before serving.
Serve straight away for the best soft, chewy texture. Eomuk, cabbage or boiled eggs are optional additions from the existing recipe; the basic ingredient list does not include them. More additions can change how much sauce you need, so keep the pan from drying out.
For other recipes using the same staples, see the Korean pantry starter guide and the ingredient pages linked above.
Bring 360 ml of water to a boil in a pot. Add the tteokbokki rice cakes. If the rice cakes are frozen, soak them briefly in water first.
When the water starts boiling again, add the sauce ingredients and mix well. Keep stirring often while the rice cakes cook, so they do not stick to the bottom.
Simmer until the sauce has reduced and becomes slightly glossy. Cut the green onion into small pieces with scissors and sprinkle sesame seeds on top.
Serve right away. If you want to make it more filling, you can add eomuk, cabbage, boiled eggs, or extra sesame seeds.
Share the link, a short introduction or an image made with the existing recipe photo.
Download the image, then paste the title, description and link into the matching fields of a new Pin.
Review the text and choose a suitable board. If the original photo was made or edited with AI, mark it as AI-modified when publishing.